How can I add text to a photo in the dotphoto editor?
How can I add text directly to a photo?
(Scroll down to see how to add a text box with a white background.)
Let's say you want to add a label to this photo before you print it as a square throw pillow.
TEXT TIP: If you want your text to be readable, make sure that it has high contrast -- that is, black text on a light background or white text on a dark background. You may also want an identifying marking, but you may not want the text to stand out; in that case, choose colors with less contrast so that the text does not call attention to itself.
Start by tapping the photo you want to edit.
Tap the Edit icon (the pencil) in the upper left corner to enter edit mode.
 Choose the Text icon (T) on the left menu.
The Text menu appears at the top where you can select fonts and other text attributes:
Click on your photo and type your text.
You can move the text after you type it, or you can undo it with CTRL-Z or by choosing Undo from the Edit menu at top.
The Warp feature enables you to transform text after you type it. In the illustration below, we have chosen Arc from the Warp Style menu.
When you are satisfied with the text, confirm your edit by clicking on the Check, and choosing File and Save from the top menu.

To add a text box to your photo
A text box enables you to add full description on the front of the photo. Text boxes are more readable because you can have high contrast: for instance, black text on a white background.
1. In the photo editor, tap the Rectangle tool on the tool bar on the left
2. Choose the color from the Fill box on the top. (White and yellow will provide the best contrast.)
3. Drag the box from corner to corner. Hold down your mouse button, drag to the opposite corner and release the mouse button. If you make a mistake, tap CTRL-z to go back.

When you are satisfied with your text box, lock it in by tapping Layer at the top and choosing Flatten Image. You can now add text to your text box.

To add text to your text box
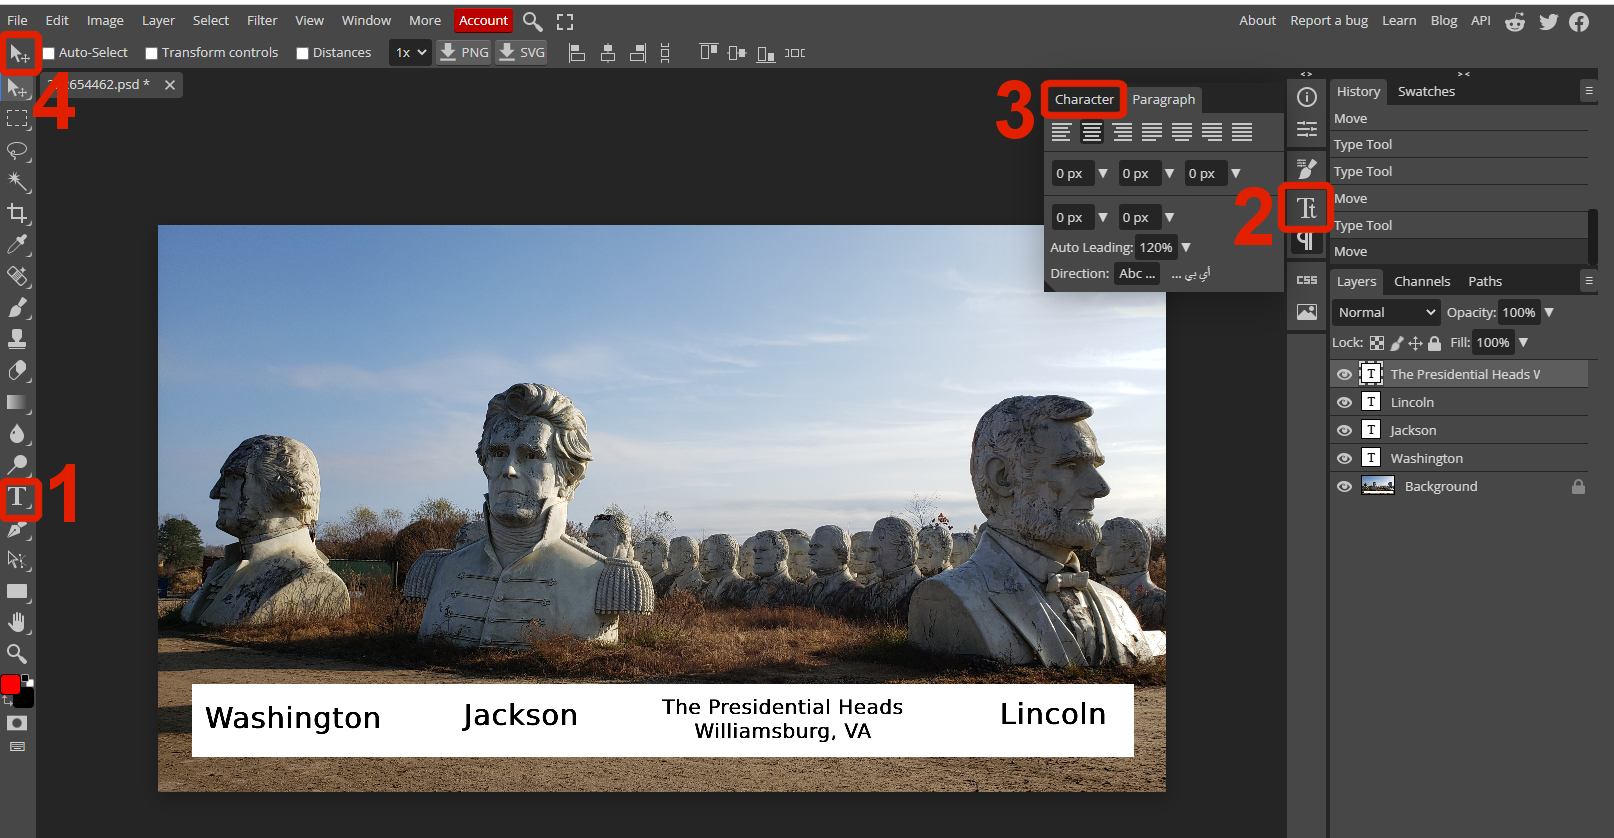
1. Tap the "T" Text tool on the left
2. Tap the "Tt" Character tool on the right.
3. Choose the Character fields to set the size and color of your text. Choose Paragraph to center or justify text.
4. To move the text to your Text Box, tap the Cursor at the top left. Now grab the text and place it in your text box. (Point to the text, hold down your mouse key, and drag the text to where you want it within your Text Box.
When you are satisfied with your text box, choose File and Save from the top menu. Your photo will be saved as a duplicate with the new text on it. This will NOT overwrite your original file.
dotPhoto FAQs: how to do almost anything at dotPhotoAbout Us
dotPhoto Pro
Account Info
Products